Getting Started with SwarmUI
In this comprehensive guide, we will walk you through the fundamental principles and features of using SwarmUI, a versatile image generation interface. Additionally, we will delve into the core concepts of Stable Diffusion technology, which powers this image creation process.
Table of Contents
- Understanding General Layout and Features
- Basic Parameters
- Available Models
- Generating Your First Image with SwarmUI
- Conclusion
Ditch costly subscriptions and enjoy the freedom and privacy of dedicated local computing via any device on your home network with InsightReactions’ Tiny Llama AI Home Server. Generate images, converse with LLMs, accelerate projects, and more—all while retaining complete control over your data. Get one now at the InsightReactions Store.
Understanding General Layout and Features
To begin, navigate to the tinyllama.local landing page and access the SwarmUI service by clicking on the “SwarmUI” tab.
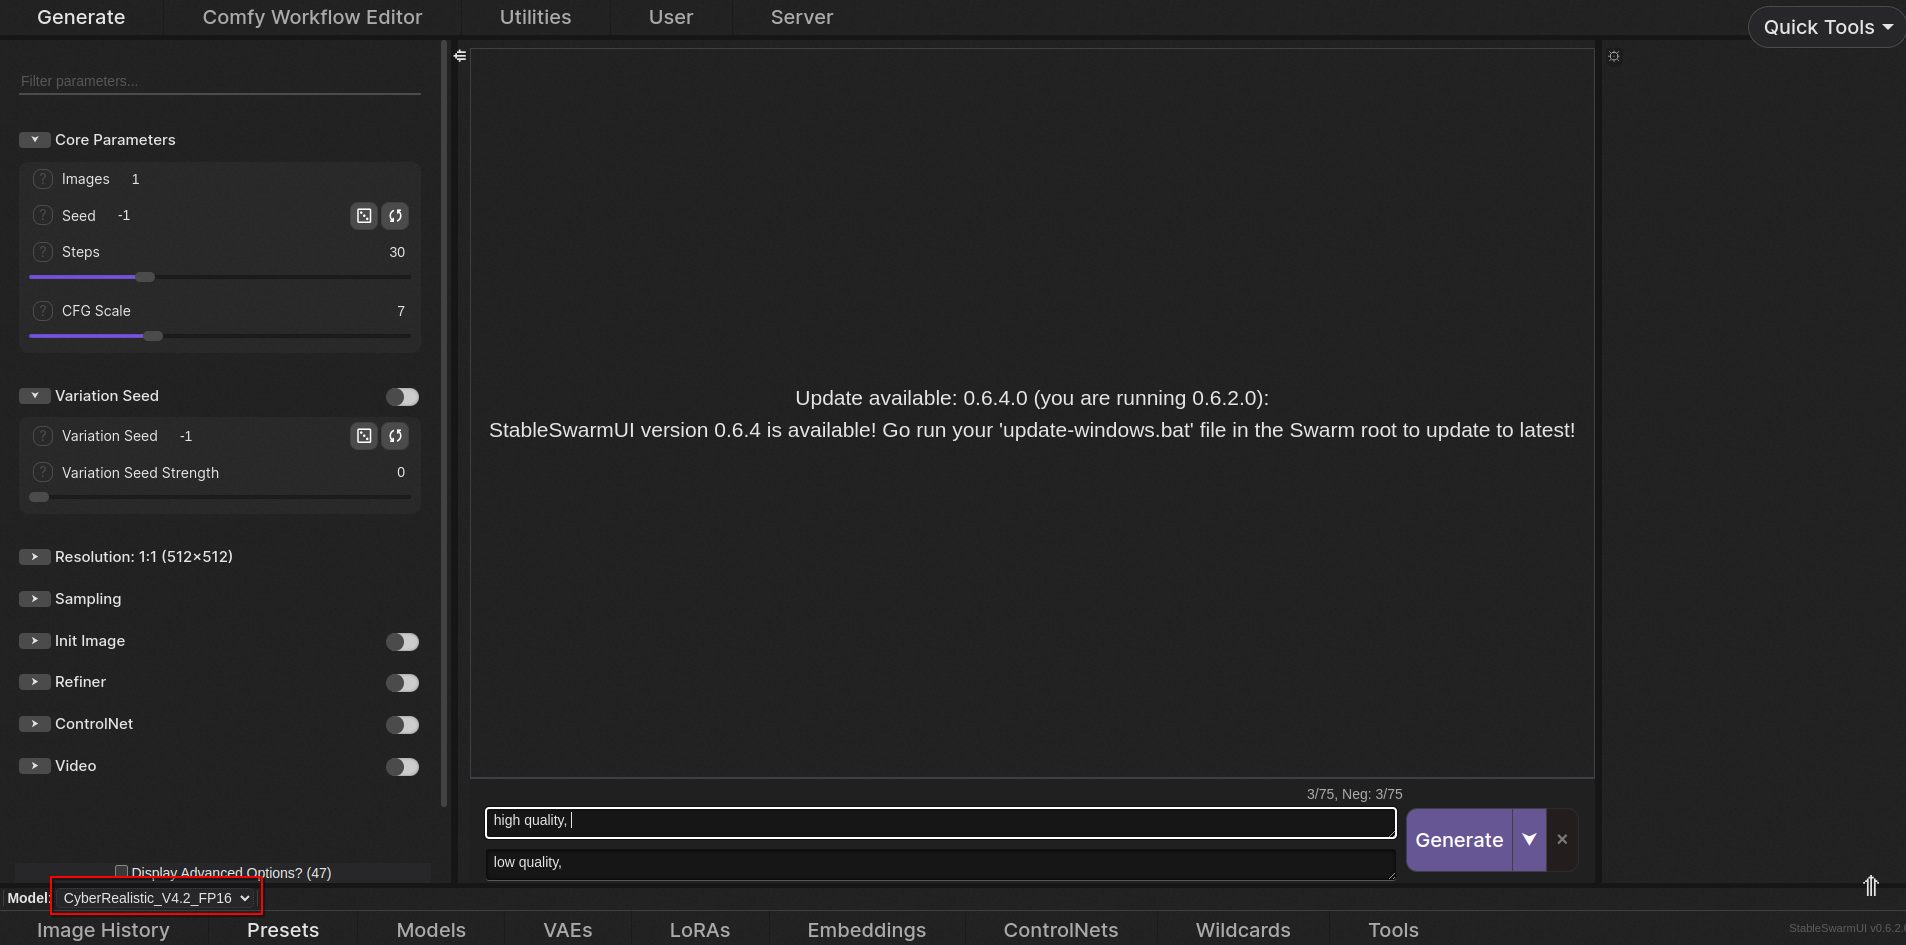
Upon loading SwarmUI, you will be presented with a user-friendly interface featuring various tabs and settings. This guide aims to cover the essential aspects:
- At the top of the interface, there are various tabs. Our primary focus is on the “Generate” tab.
- On the left side, you’ll find Stable Diffusion parameters that can be expanded for more detailed customization.
- The middle section displays the generated image output and its corresponding prompt. A “Generate” button is located here.
- On the right side, there’s an option for batch image generation with a single click.
- Additional settings are available at the bottom of the interface, such as model selection and Image History to enhance your image creation process.
Basic Parameters
In this section, we will explore the fundamental parameters available in SwarmUI’s left-hand pane.
Core Parameters
Locate the “Core Parameters” section and expand it for access to essential settings:
- Images: Specify the number of images to generate simultaneously.
- Seed: Utilize a random seed or manually specify one to achieve consistent image results. The Reuse button can be used to preserve the same seed for future generations.

- Steps: The Stable Diffusion model executes a certain number of times for a given set of noise. Increasing steps can lead to improved image quality, but there may be diminishing returns at higher values.
- CFG Scale: Adjust the CFG scale to control how closely the model adheres to your prompt. A lower value encourages creativity, while a higher value enforces strict adherence.
Variation Seed: Introducing Randomness to Images
Use the variation seed to introduce randomness to your image generation process. Enable the slider and specify a value for the Variation Seed Strength, within the recommended range of 0.1-0.5.
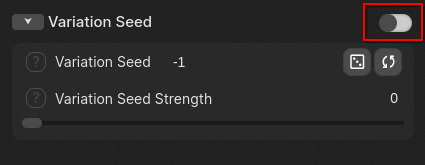
Image Resolution Options
Configure SwarmUI to generate images at specific resolutions by entering an exact pixel-by-pixel value or selecting a ratio. Some models may perform better with particular resolutions, but flexibility is generally maintained.
Sampling Methods for Image Generation
Samplers are a fundamental component of Stable Diffusion technology. Selecting the optimal sampler can significantly impact image quality and creativity. Consider the following options:
- Sampler: The default Euler Ancestral sampler is suitable for most use cases.
- Scheduler: Schedulers modify the behavior of the chosen sampler, and their usage is generally application-specific.
Additional Parameters and Settings
The remaining basic parameters (Init Image, Refiner, ControlNet, and Video) are not addressed in this guide. However, they will be covered in more detail in separate guides.
Available Models
SwarmUI offers two pre-trained models tailored for various image creation tasks:
- CyberRealistic: A Stable Diffusion 1.5 model ideal for generating realistic images.
- DreamShaperXL: A Stable Diffusion XL model providing a wide range of art styles and creative possibilities.
These models are based on different Stable Diffusion versions, with CyberRealistic (SD 1.5) being a faster option but with lower overall quality, and DreamShaperXL (SDXL) offering higher image quality at the cost of increased processing time. Fortunately, SwarmUI automatically adjusts settings for each model.
Switching Between Models
To change your Stable Diffusion model, simply expand the model selection in the lower left-hand corner of the interface.
Generating Your First Image with SwarmUI
Now that you’re familiar with the general layout and basic parameters, let’s create your first image using SwarmUI. The default settings provided work fine for this example.
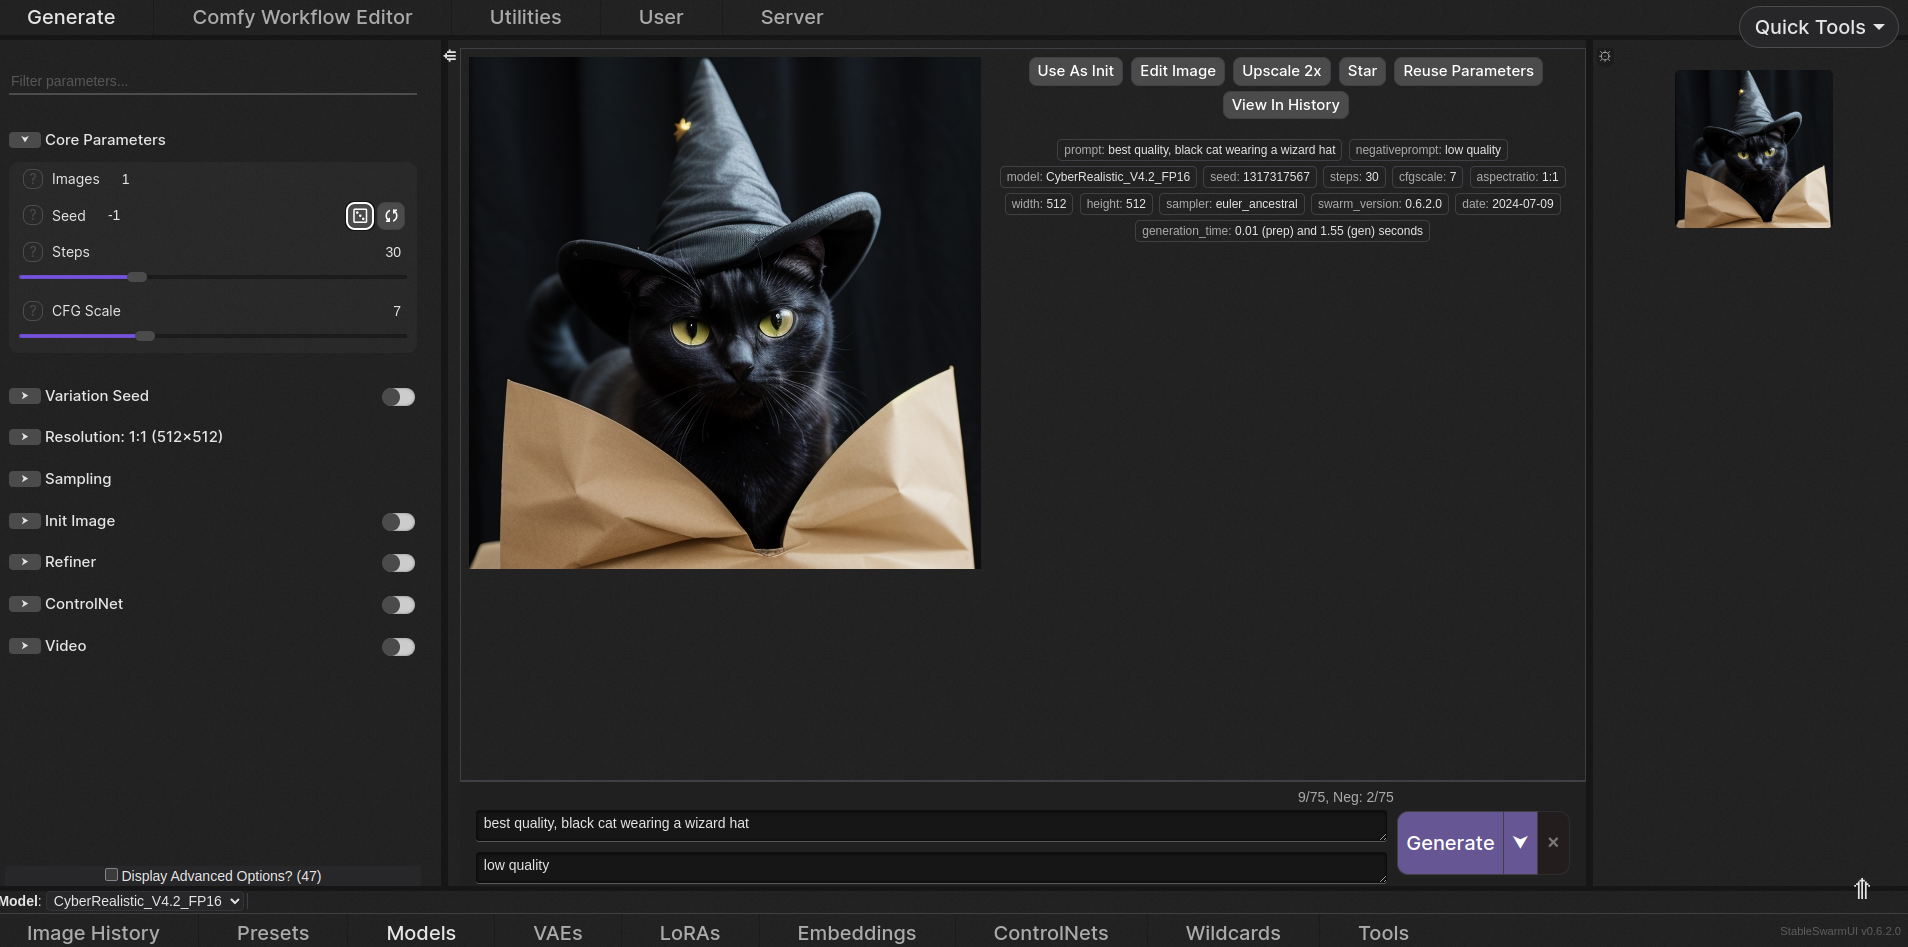
- In the center region, enter your Positive and Negative prompts in the text boxes. Place relevant details in the Positive prompt and unwanted elements in the Negative prompt. These will be prepended with “best quality” and “low quality,” respectively, to guide the model towards optimal image creation.
- For this example, let’s generate an image of a cat wearing a wizard hat. Type “cat wearing a wizard hat” after “best quality.” Separate concepts in your prompt with commas.
- Click the Generate button to initiate image generation.
Conclusion
Stable Diffusion technology and SwarmUI provide a powerful combination for image generation. This guide has covered the essential aspects, but there’s more to explore. Feel free to ask questions by clicking the ‘?’ button next to each setting for a brief description.